 Editor’s note: This is the second installment in a series by Joe “Coop” Cooper, our Contributing Editor and the author of the monthly “Coop’s Corner” column, in which Coop is sharing his vast knowledge of shorthanded sailing and offering tips on cost-effective improvements to make your boat easier to handle with a small crew. If you missed Part I, you can read it online at windcheckmagazine.com.
 The very first area on any boat that can inevitably benefit from modest upgrades is the sail control systems. All too often I see boats sailing around with the sails way too full for the prevailing wind, often with incorrect sheet leads for the headsails, insufficient halyard tension, poorly made reefs and similar flaws in the shaping of the sails, all of which contribute to more heel, more weather helm and a general sense of overwhelming-ness, not to mention reduced speed and hampered ability to point, all making for a longer trip to where ever they are going. There are a few things that can be done to improve the ease with which the “gears” can be changed on your boat to match the conditions. Let’s start with the mainsail.
The areas of a mainsail’s adjustments that can be improved are: a) the outhaul; b) the luff tension/Cunningham; c) the reefing system; d) the mainsheet adjustment; e) the backstay adjustments; and f) the traveler. Sailors, for the most part being human, are more inclined to change something if it is easy to change and less so if it is difficult. Don’t believe me? Contemplate the ease of access to your engine’s dipstick for a minute.
The Outhaul
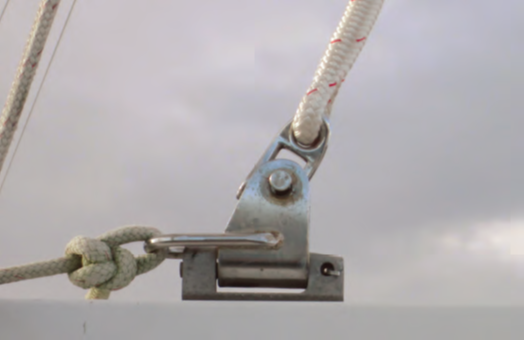 This needs to be really easy to adjust, and as standard on most on production boats, especially of an older vintage, it is not. Most boats have some kind of slider or slug on the end of the boom to which the clew of the sail attaches. The large amount of surface contact between a usually stainless steel fitting and the aluminum spar, combined with a meager outhaul tackle of 2:1 or 3:1 makes it impossible to move the outhaul when sailing close-hauled. Change this!!! By far the easiest way to reduce friction at the clew is with a “Spectra clew strop.” This is a length of Spectra webbing with Velcro sewn onto it. It wraps around the boom, through the clew ring, usually about three times, and the Velcro attaches to itself. Ask your sailmaker for the particulars. He will need the circumference around the boom through the sail. Next, upgrade the outhaul to at least 8:1 on the adjustment tackle. Ideally this will come aft where it is easily adjustable from the cockpit when sailing close-hauled. If it is easy…
The Cunningham
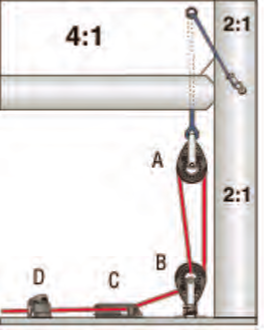
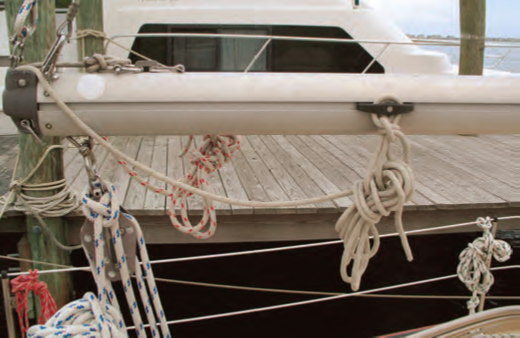
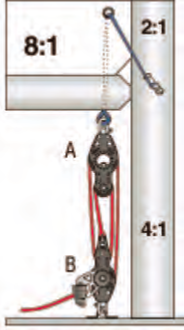 I cannot tell you the number of times prospective sail customers said they did not want a cunning eye because “they did not race.” Whether you are racing or not, it is a matter of having the boat operating in the right gear for the conditions. A
Cunningham is, as you know, a small grommet in the luff of the sail, commonly 12 inches or so above the tack. A tackle is used to adjust the luff tension on the mainsail. The tackle need not be super powerful; for example a 6:1 (made by using a 3:1 and doubling it) is adequate for boats up to about 40 feet. And it need not be made from cordage strong enough to lift the boat. In fact, thinner is preferable so 3/16” double polyester will do the trick. Low friction blocks are a big help, too.
The Reefing system
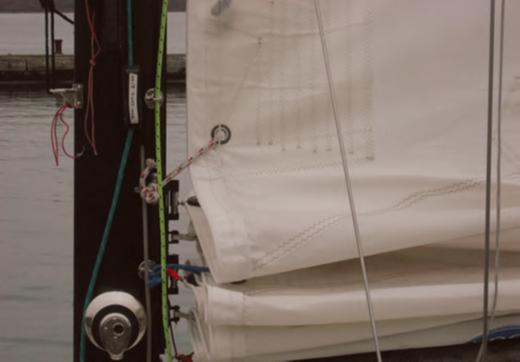
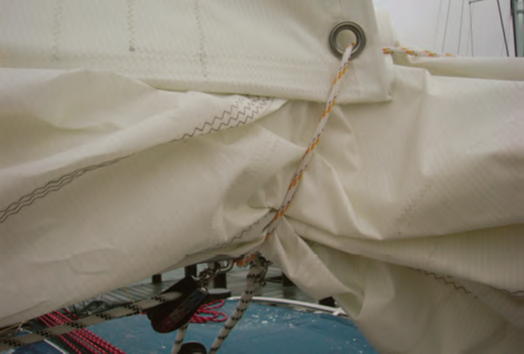
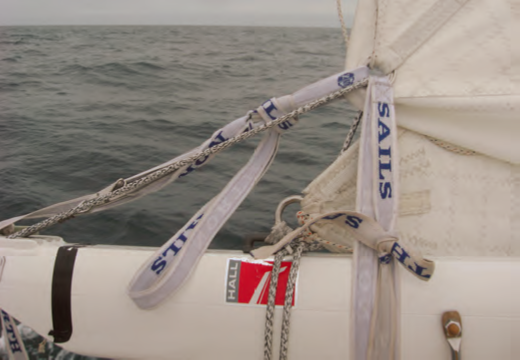
 This is a three-part story by itself, but in sum a reefing system needs to exhibit the following properties: a) Be easy to set
and shake out; b) Hold the sail’s shape when set, and; c) The reefing lines ought to run clear of anything that will chafe them. Low-friction blocks and cordage help these primary criteria enormously. There are three or four basic types of reefing systems. For my money, the easiest of all is a) single clew line with the tack being attached to the upside down J-hooks at the tack. Next is b) a “single line” system where one line runs through all the sheaves and cringles in the sail and back to a winch, and c) the same as b) but with two lines: a clew line and a tack line. There used to be a variation on the single line system that some older boats with Isomat booms from the 1980s may still have, which employs a “shuttle” inside the boom. It has two lengths of line, but looks like one single line system. The fastest way to make reefing easier, after having a simple path for the lines to follow, is to make the cordage thinner and use low-friction blocks and sheaves. I think there is value to be had in removing the usual 7/16-inch double braid polyester line and replacing it with much thinner stronger line, “Hi-Tech” in the vernacular. Consider this information from the West Marine website:
 7/16-inch New England Ropes double braid polyester: Breaking load: 7,100 lbs. Stretch: 2.4% at 15% of break. This means a 1-meter length of line stretches about 24 mm, or roughly an inch at 1,065 lbs. If your reef lines are, say, 50 feet, or 15.25 meters (I am using metric meaurements coz the math is easier for me) then your reef line is stretching 15 times one inch…at only 1,000 lbs. This is why you need to keep grinding on the line when the reef looks like it is down; you are grinding out the stretch in the line. This line is cited on the website at $1.71 a foot. Times 50 is $85.50.
And from the same source: ¼-inch New England Ropes Endura braid uncovered Spectra: Breaking load: 8,500 lbs. The stretch is one% at 30 percent of break. Thirty percent of 8,500 lbs. is 2,550 lbs. (2.4 times higher than the previous example), and the stretch on the one meter sample is one millimeter. Times 15.25 meters is 15 millimeters – about 5/8 of an inch. Cost is $2.51/foot or $125.5 or roughly plus 46%. Applying Cooper’s Value Theory (as I stated last month, if solution “A” costs 10 bucks, and solution “B” is 20 bucks, then “B” needs to be at a minimum at least two times better at solving the problem than “A.”), the line is 46% more expensive but it stretches 15 times less and will run more smoothly, thus making it easier to put in a reef and have the reefed sail retain the shape you want. Having reefs that stay flat helps the boat not load up so much, nor heel or round up as much and does not tax the helmsman (be he you or your missus or the autopilot), and you will go faster.
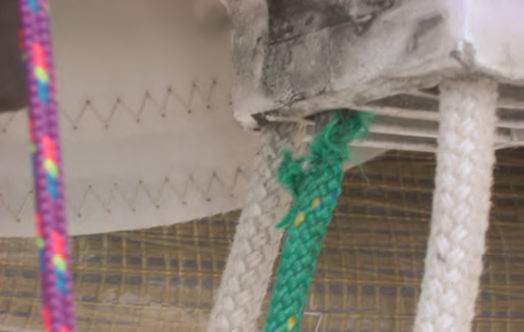 But the bigger value, I reckon, is the ease with which the line will render through all the blocks and corners it has to pass through between the sail and the clutch and winch. Consider this track the reef line takes: From the aft end of the boom, the reefing line goes up the sail and does a 180-degree turn through the reef ring in the sail, (the reefing rings pressed into the sail are naturally very thin, so the friction here is greatest, with a sharp, high friction 180-degree turn right at the beginning of the trip), back to the sheave at the end of the boom and another 110-degree turn, forward along the inside of the boom, another 90-degree turn down to the deck, a 90-degree turn at the base of the mast, and a 60-degree or so turn at the line organizers on deck then aft, (dragging along on the non-skid on the deck…) to the clutch and winch. No wonder it’s almost impossible to pull the reef line even where there is “no load” on it! The drag and friction in a “single line reefing” system is even worse.
Sometimes, however, a sailmaker has to accommodate what sailors are used to. On one boat I did sails for that had single line reefing, we used blocks at the reefing rings to lower the friction enormously. Compounding the friction is the diameter of the line related to the blocks. The cordage maker’s recommended ratio between the line diameter and the sheave diameter is 8:1. So, for ½-inch line you need a 4-inch diameter sheave, which you do not have unless you’ve retrofitted them yourself. But, the ¼-inch diameter Spectra is the right ratio. The uncovered Spectra is also much slipperier, making it much easier to render through the corners outlined above.
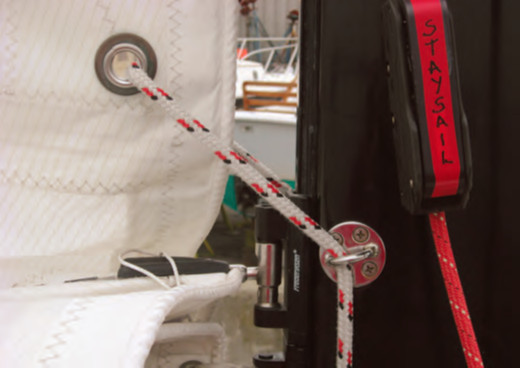 There are two other considerations with the Spectra line in this example: You cannot, or do not want to, simply tie knots in the end of the line and forget it. Knots in high-strength line reduce the performance numbers by close to 50%, so the boom end needs to have an eye splice in it. This is actually good because now you can tie the boom end of the reef line onto the boom in a way that it will stay in place by using Spectra lashing passed around the boom a few times. Splices in this kind of line are cheaper because it is faster to splice.
Another detail that many sailors miss is that the point on the boom where the reef line secures must be aft of the reef ring on the leech of the sail. This is so the “foot” of the reefed sail can be tensioned to keep the sail flat. Too often I have seen reefs where the end of the reef line attached to the boom has slid forward, thus making it impossible to flatten the sail fully when reefed. Secondly, there will need to be a cover on the line where it is held in the clutch/jammer. This type of rigging detail has become so common that the cordage makers now offer a dedicated manufactured cover. Your favorite rigging technician will know about this.
The Mainsheet
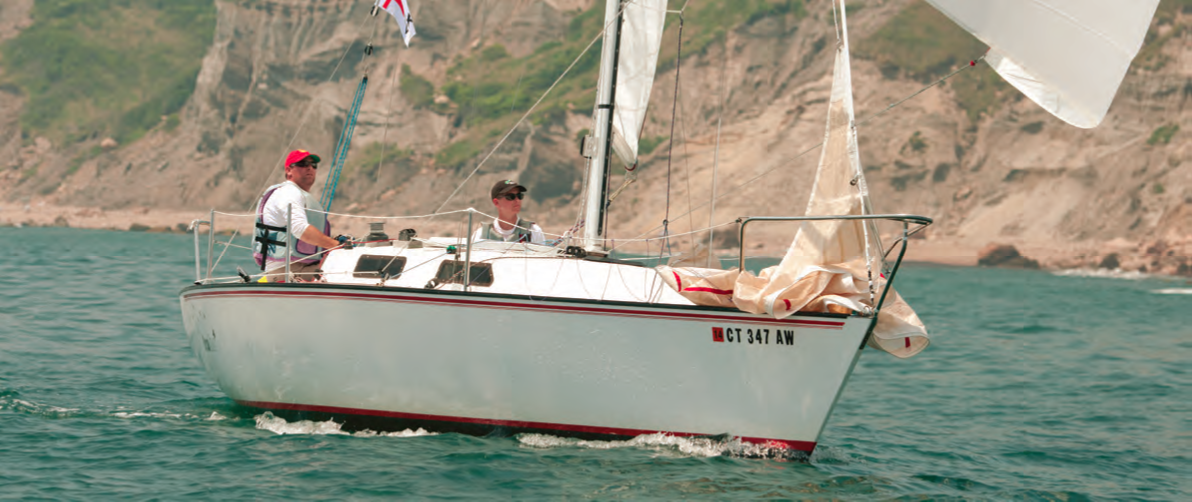
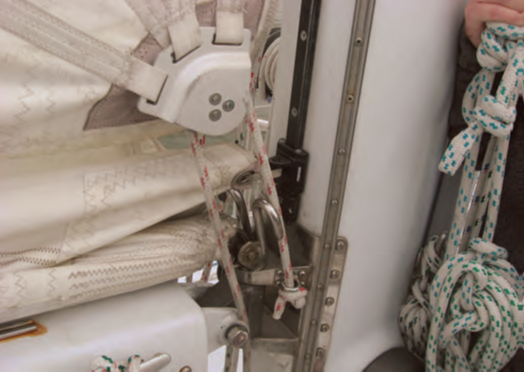
The next detail that can bear improving on any production boat is the mainsheet, both in its position on the boom and the ease with which it can be adjusted. There are two components to this. How quickly and simply can you let it out or pull it in, and how easily and swiftly can you adjust the traveler? The worst offenders in my view are the set-ups where the mainsheet is on a traveler on the cabin top, coming to a winch next to the hatch and the steering is by wheel at the aft end of the cockpit completely removed from the sail controls. To me, this is like having your car’s steering wheel in the back seat and the gas and brake pedals in the front.
I know that many boat builders and consumers prefer to have the traveler up on the cabin out of the way, but experience will tell you that you therefore need a stronger (heavier) boom and related traveler fittings and deck structure, and it is harder to trim the main. Regardless of the sheeting position on the boat, for all classes of mainsheet arrangement my same low-friction mantra is applicable to any situation where lines need to run freely: low-friction blocks and thin lines.
 A handy formula to estimate just how much load you have on your the mainsheet is published by Harken on their website. From the homepage, click on “Product support,” then “Calculators.” For the following discussion, I have used a standard Catalina 36 with a P dimension (mainsail luff length) of 38.9 feet and an E (foot length) of 13 feet. Follow along:
The Catalina 36 has the mainsheet roughly in the middle of the boom and the traveler on the cabin top. Using the Harken calculator (and they concede it is a guide) and assuming the mid-point of the mainsheet’s attachment to the boom is 5 feet forward from the end of the boom, the loads on the mainsheet system and traveler are as follows:
With a full mainsail at 15 knots of apparent wind, the mainsheet load is 756 lbs. At 20 knots, the load increases to 1,344 lbs., and at 25 knots it’s 2,099 lbs.
If the mainsheet and traveler were at the end of the boom, at 13 feet aft of the mast, the following would be the loads in the same three wind speeds: 465 lbs., 827 lbs., and 1,292 lbs. What is the punchline here? Take a long, hard look at your boat, the way you sail and the possibilities for getting the mainsheet system closer to the steering station. Yes, I know it is a big undertaking not to be embarked upon lightly, but if your boat has the wheel at the stern and the mainsheet 8 to 10 feet forward, you know of what I speak. There are ways of leading the mainsheet closer to the steering position, but again that’s a whole article on its own. In any event, look also at the options for replacing the ½-inch polyester double braid and bushing blocks with lower friction ones and narrower, stronger, more slippery and stretch-resistant cordage.
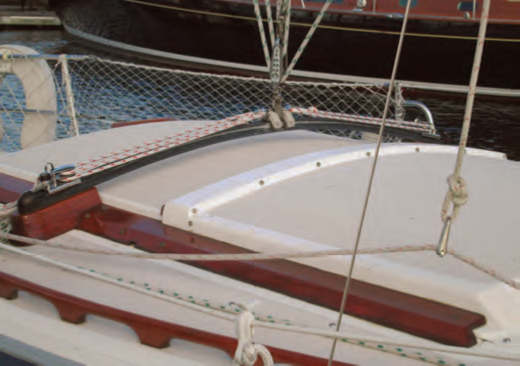 Another huge impediment to efficient operation of the mainsail’s gearbox is the negative camber of the traveler that I see on many mainsheet systems, especially those mounted on the cabin top. By this I mean that the traveler is bent, so that assumes a frown face (higher in the middle than at the outboard ends) rather than either straight or a smiley face (curved upwards at the ends). With this downward curve, the distance between the boom and the ends of the traveler is greater than the distance between the traveler and the boom in the middle of the traveler. It is functionally the same as having no traveler, since it does not work.
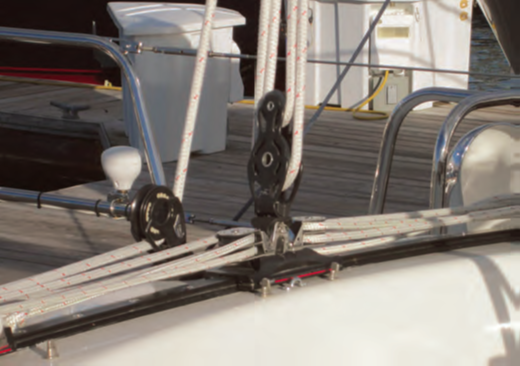
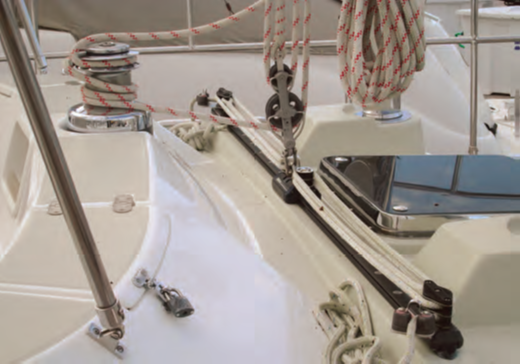
On this properly set up mainsheet, you can see here that the last fall of the sheet renders through a stand-alone block, thus not restraining the traveler car as in the earlier images. Another detail to contemplate is that the traveler can only slide to leeward a distance equal to the radius that is the distance between the last block on deck and the boom.
The Backstay
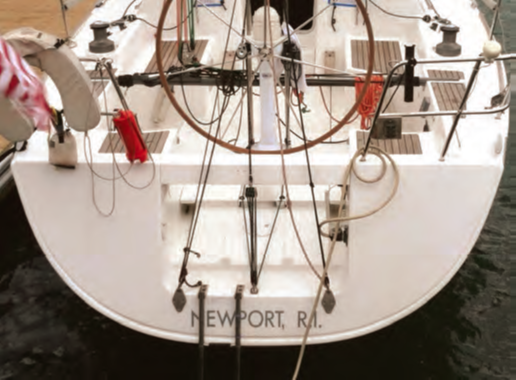 Tensioning the backstay does two things. It reduces the sag in the headstay, helping to make the sail flatter, and it bends
the mast either a bit or a lot depending on the boat. This helps flatten the mainsail. Backstay adjusters come in two
basic flavors: Manual screw cranks and hydraulic. Stand-alone hydraulic cylinders are made by SailTec and Navtec and range from around $1,200 to $2,100 depending on size and are pretty easy to install either by you or a yard/rigger. Mechanical ones are available from Wichard for $500 to $1,600. If your boat is not too big or has any kind of fractional rig, a block and tackle option is worth exploring too. The landscape on versions of a tackle system is broad, so consult with your favorite rigger to get one that works for your sailing.
Next month: Headsails & spinnakers
Australian born, Joe ‘Coop’ Cooper stayed in the US after the 1980 America’s Cup where he was the boat captain and sailed as Grinder/ Sewer-man on Australia. His whole career has focused on sailing, especially the short-handed aspects of it. He lives in Middletown, RI where he coaches, consults and writes on his blog, joecoopersailing.com, when not paying attention to his wife, teenage son, dog, two cats and several, mainly small, boats.

